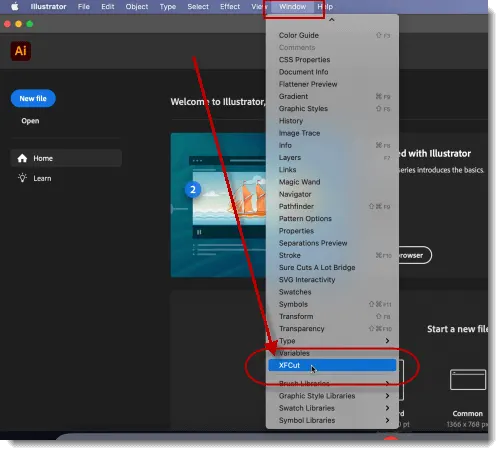
XFCut is a plugin for Adobe Illustrator to allow you to cut your designs with your vinyl cutter or cutting plotter. After you install XFCut, open Adobe Illustrator and you should see "XFCut" under the Window menu.
After you choose XFCut from the Window menu, the XFCut panel should now be visible. Here you can choose Manage Cutters to add your cutting plotter.
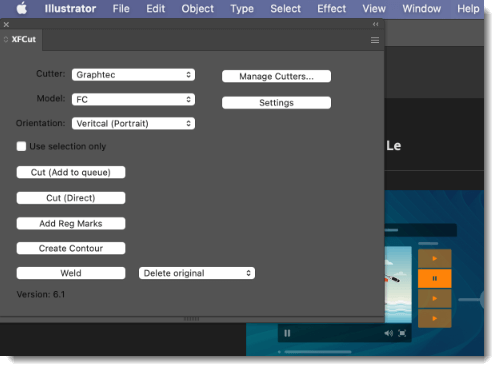
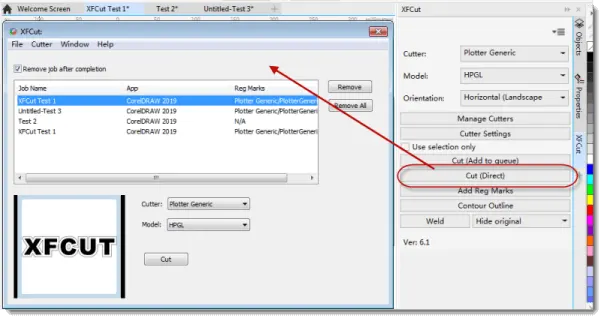
When you are ready to cut your design, click the "Cut (Direct)" button and it will send the job over to the XFCut job manager. You can see a list of jobs and send it to your vinyl cutter.
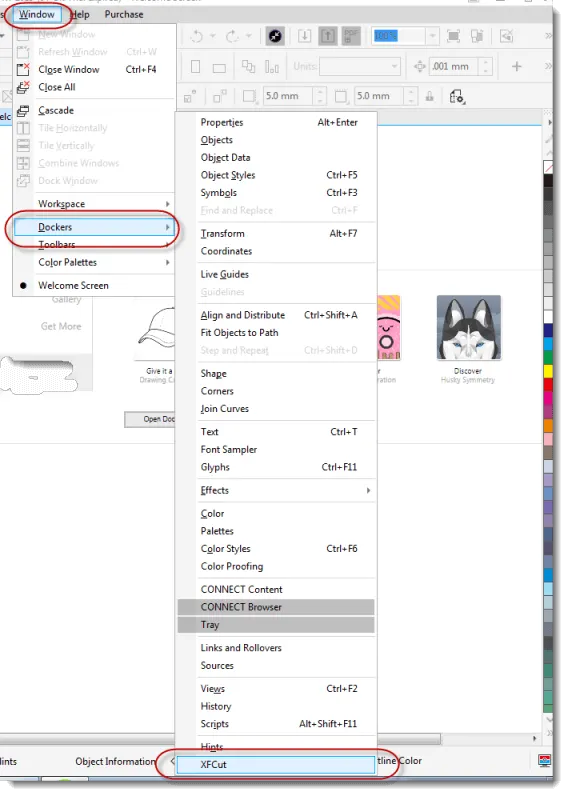
XFCut is a plugin for CorelDRAW to allow you to cut your designs with your vinyl cutter or cutting plotter. After you install XFCut, open CorelDRAW and you should see "XFCut" under the Window -> Dockers menu.
After you choose XFCut from the Docker menu, the XFCut docker should now be visible in the Dockers panel. Here you can choose Manage Cutters to add your vinyl cutter or cutting plotter.
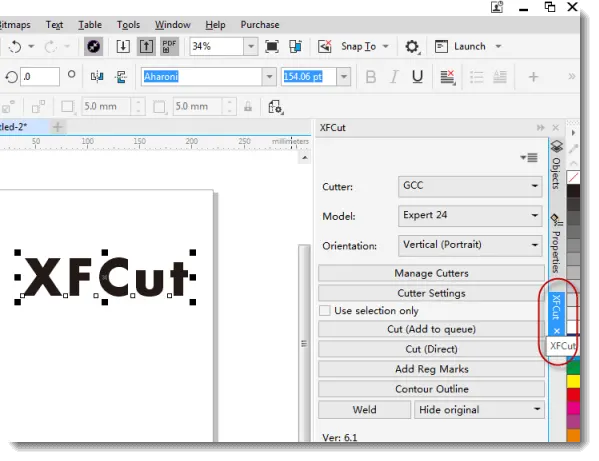
When you are ready to cut your design, click the "Cut" button and it will send the job over to the XFCut job manager. You can see a list of jobs and send it to your vinyl cutter.
You can specify how each layer is to be processed by XFCut. By default, each layer will be cut. If you want to change the layer, you can set the name of the Layer to one of the following:
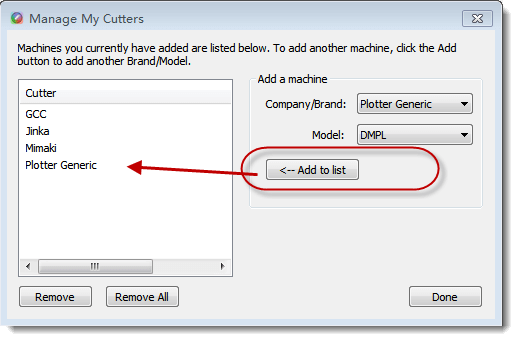
In the Manage Cutters window, you can add your vinyl cutter(s) by choosing the Company/Brand and Model and then click Add to list.
In the Cutter Settings window, you can adjust settings for the current vinyl cutter. Settings may vary depending on which vinyl cutter is currently selected.
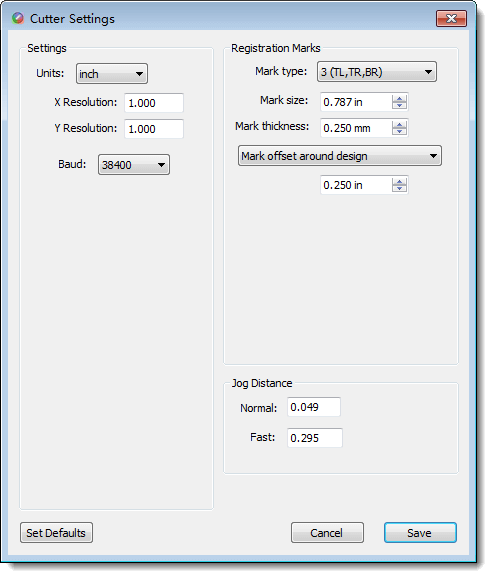
Resolution Settings: If cuts are coming out larger or smaller than designed, you can adjust these values. If it is cutting too small, increase the values. If it is cutting too large, decrease the values. Values are based off 1 x 1 inch square.
Registration Marks: If your Print+Cut (Contour Cutting) is supported by the current vinyl cutter selected, you can adjust how the registration marks will be added.
Mark size: Size of each mark.
Mark thickness: Line thickness of each mark.
Mark offset: Can choose to have marks placed around the design, or inset from the page bounds by a specified amount.
Normal: Distance to move the blade carriage after each arrow key press.
Fast: Distance to move the blade carriage after each SHIFT + arrow key press.
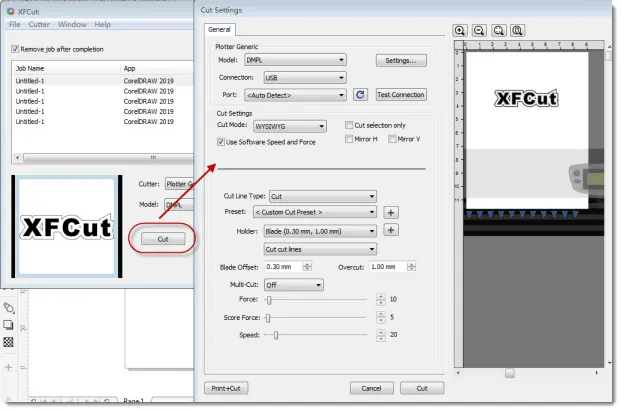
When you are ready to cut your design, click the Cut button and the design will be sent over to the XFCut job manager.
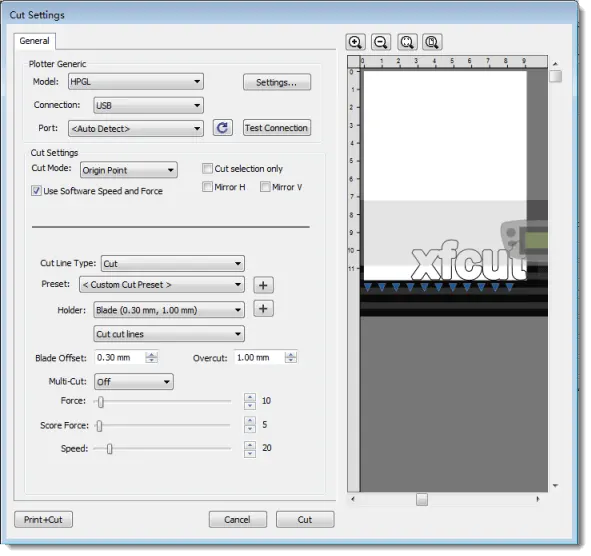
When you select the job and click Cut, it will open the Cut Settings window.
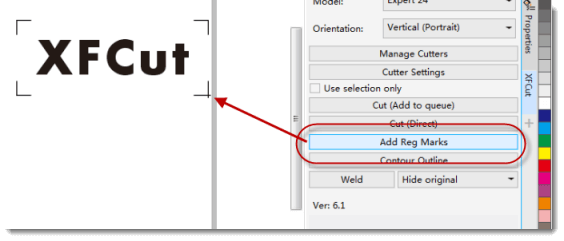
Registration marks can be added around your design by clicking the "Add Reg Marks" button, provided the current vinyl cutter model selected supports Print+Cut (Contour cutting).
You can adjust registration mark settings by clicking the "Settings" button.

The General tab has the basic settings for cutting your project.